반응형
※ 다른 버튼을 누르면 알림 창의 다른 내용 보이게 하기
※ 하나의 function으로 다른 역할을 하는 버튼 만들기
※ 닫기 버튼은 이벤트리스너로 구현
1. html
<!DOCTYPE html>
<html>
<head>
    <meta charset="UTF-8">
    <title>Document</title>
    <link href="css/reset.css" rel="stylesheet">
    <link href="css/main.css" rel="stylesheet">
    <meta name="viewport" content="width=device-width, initial-scale=1.0">

</head>

<body>
    <div class="alert-box" id="alert">
        <span class="alerttext">알림창임</span>
        <button class="alertclose-btn">X</button>
    </div>
    <button onclick="openbtn('block','아이디입력하세요');">버튼1</button>
    <button onclick="openbtn('block','비번입력하세요');">버튼2</button>

    <script>
        document.getElementsByClassName('alertclose-btn')[0].addEventListener('click', function() {
            document.getElementById('alert').style.display = 'none';
        });


        function openbtn(a, b) {
            document.getElementById('alert').style.display = a;
            document.getElementsByClassName('alerttext')[0].innerHTML = b;
        };
    </script>

</body></html>
2. main.css
.alert-box {
    background-color: skyblue;
    padding: 20px;
    color: white;
    border-radius: 10px;
    display: none;
    float: left;
    width: 100%;
}

.alertclose-btn {
    font-size: 16px;
    float: right;
    background-color: skyblue;
    border: none;
    color: white;
    height: 21px;
}

.alerttext {
    float: left;
    vertical-align:
}
3. reset.css
body {
margin: 0
}
div {
box-sizing: border-box;
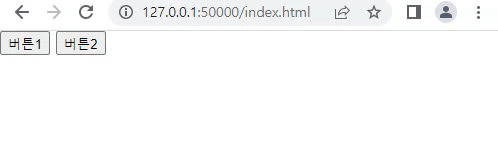
}4. 출력화면
반응형
'JavaScript > 실습' 카테고리의 다른 글
| [javascript] 369게임(문자검색 match, 배열요소결합 join, 배수 %, 내림 math.floor) (0) | 2023.01.21 |
|---|---|
| [javascript] input 이벤트 (0) | 2023.01.20 |
| [javascript] form 전송 및 막기, if 문 (0) | 2023.01.17 |
| [javascript] 제이쿼리(jquery) 자바스크립트 모달창 (0) | 2023.01.16 |
| [javascript] 부트스트랩(bootstrap), 쿼리셀렉터(querySelector) (0) | 2023.01.11 |


댓글