반응형
방법1. CDN ../public/index.html 에 붙여넣기
<link href="https://cdn.jsdelivr.net/npm/bootstrap@5.3.0-alpha1/dist/css/bootstrap.min.css" rel="stylesheet">
<script src="https://cdn.jsdelivr.net/npm/bootstrap@5.3.0-alpha1/dist/js/bootstrap.bundle.min.js"></script>
1) index.html
<!DOCTYPE html>
<html lang="">

<head>
  <meta charset="utf-8">
  <meta http-equiv="X-UA-Compatible" content="IE=edge">
  <meta name="viewport" content="width=device-width,initial-scale=1.0">
  <link rel="icon" href="<%= BASE_URL %>favicon.ico">
  <link href="https://cdn.jsdelivr.net/npm/bootstrap@5.3.0-alpha1/dist/css/bootstrap.min.css" rel="stylesheet">
  <title>
    <%= htmlWebpackPlugin.options.title %>
  </title>
</head>

<body>
  <noscript>
    <strong>We're sorry but <%= htmlWebpackPlugin.options.title %> doesn't work properly without JavaScript enabled.
        Please enable it to continue.</strong>
  </noscript>
  <div id="app"></div>
  <!-- built files will be auto injected -->
  <script src="https://cdn.jsdelivr.net/npm/bootstrap@5.3.0-alpha1/dist/js/bootstrap.bundle.min.js"></script>

</body>

</html>
방법2.
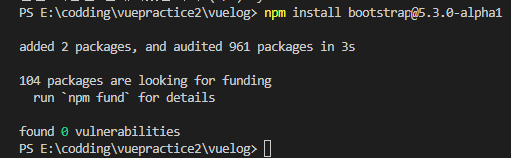
터미널 npm 설치 :
npm install bootstrap@5.3.0-alpha1
main.js 에 import :
import 'bootstrap'
import 'bootstrap/dist/css/bootstrap.min.css'
1) npm 설치 화면
2) main.js 내용
import { createApp } from 'vue'
import App from './App.vue'
import 'bootstrap'
import 'bootstrap/dist/css/bootstrap.min.css'

createApp(App).mount('#app')
부트스트랩 홈페이지
https://getbootstrap.com/docs/5.3/getting-started/download/
Download
Download Bootstrap to get the compiled CSS and JavaScript, source code, or include it with your favorite package managers like npm, RubyGems, and more.
getbootstrap.com
반응형
'Vue.js > 실습' 카테고리의 다른 글
| [vuejs] mounted (feat. lifecycle hook) (0) | 2023.01.18 |
|---|---|
| [vuejs] 게시물 or 데이터 정렬버튼 만들기 (0) | 2023.01.13 |
| [vuejs] 애니메이션(animate) transition (0) | 2023.01.07 |
| [vuejs] v-model, input, select, watch (0) | 2022.12.26 |
| [vuejs] 컴포넌트(component), Props, Custom Event (1) | 2022.12.24 |


댓글